How to create a payment gateway project in Paysera?


How to create a payment gateway project?
We’re about to guide you through the whole process, one step at a time. Before we start, however, there are a few things you should keep in mind to make the whole process quick and smooth.
- You will need a personal or business Paysera account to begin.
- You can only create a payment gateway project using your account on a web browser.
- Before you submit your project, ensure Paysera is integrated into your website and your e-shop is all set to welcome clients.
Oh, and if you prefer a video tutorial, we’ve already thought things through and prepared it for you. Check out the video below!
If you’d rather stick with reading this blog post – let’s get started!
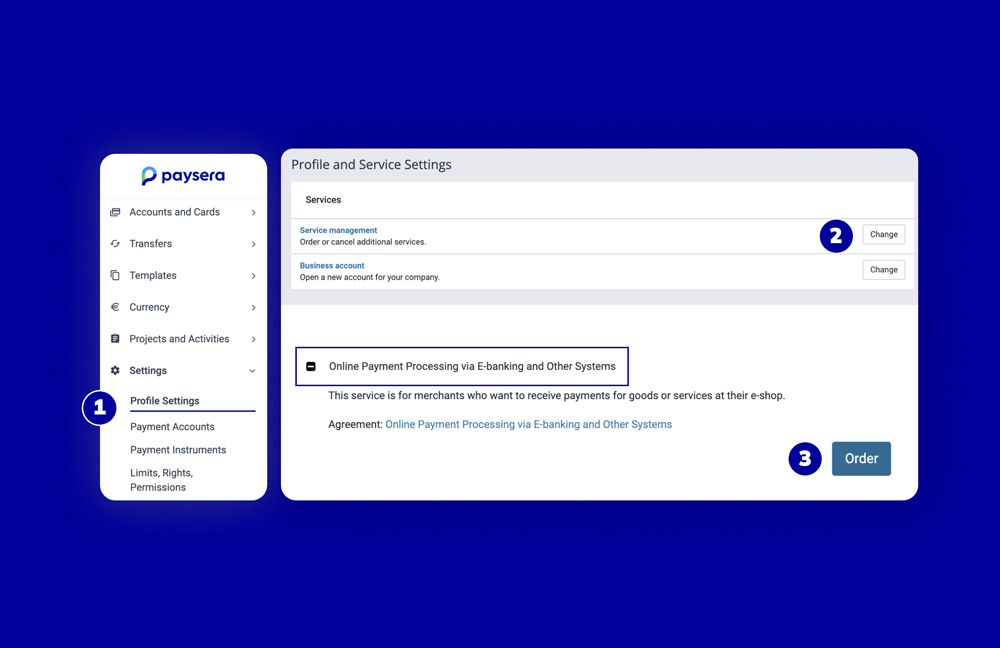
Step 1: Order the online payment gateway service
- Log in to Paysera business account using a web browser.
- Select Settings > Profile Settings > Service management > Change.
- Select Online payment processing via e-banking and other systems > Order.
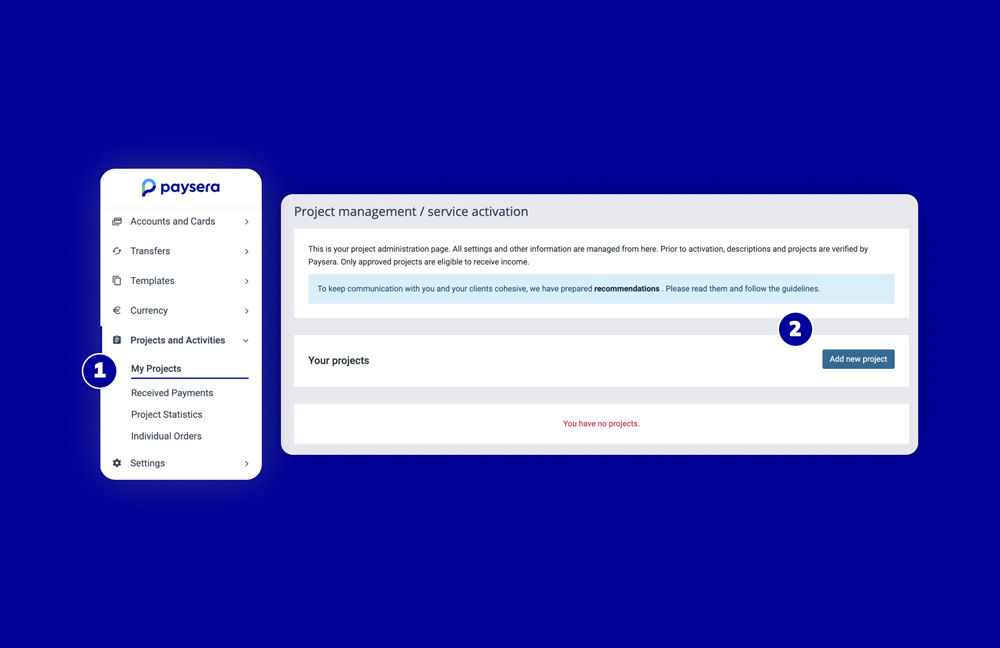
Step 2: Create your project
Now that all the services that are relevant to you are ordered, follow these steps:
- Projects and Activities > My Projects > Add a new project.
If you have your own e-shop and you’re not using any platform, select I will enter the project address manually and enter the details, then click Add.
If you are using another platform for your e-shop, such as Paysera Tickets, Shopify, or another one, select I will use a platform. Then, a list of platforms will be displayed and the address used will be entered automatically after selecting the right one. Once that’s done, click Add.
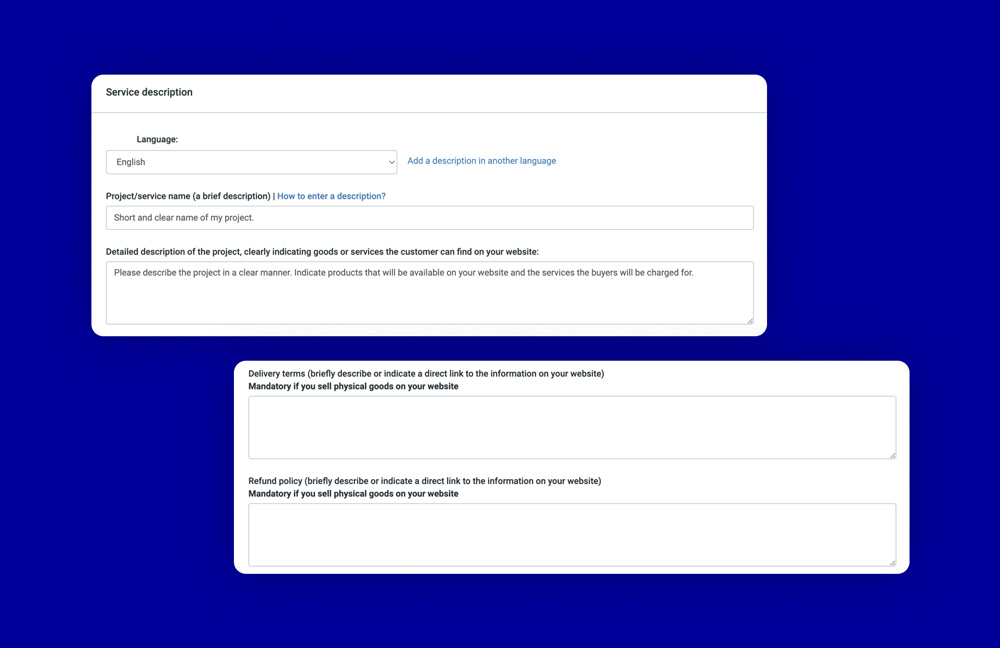
- In the section Service description select description language > enter the project’s name and give a brief rundown of the services you offer. This helps us understand exactly what your clients are paying for.
If your business involves selling physical goods, operating as a travel or insurance agency, or running a charity, it's important to include your refund policy and delivery terms here. Don't worry if you already have this information on your website – you can just paste the links.
For more detailed guidance on project descriptions, head over to our website.
Step 3: Finalise the details about your business and submit for our review
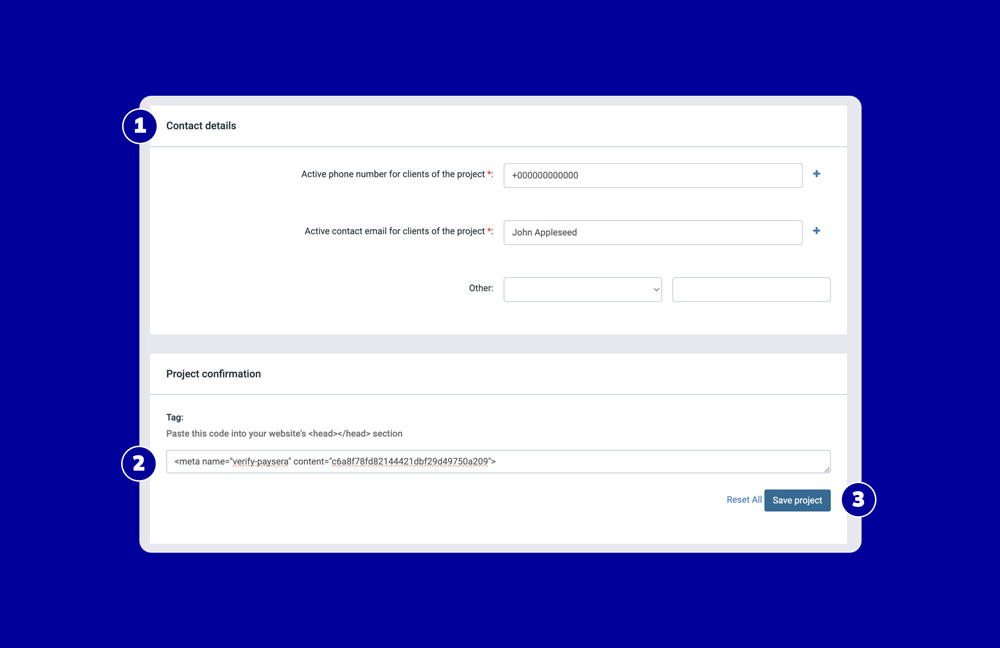
- In the Contact details section, enter your current contact information. These details will be shared with your buyers along with their payment confirmation.
- Copy your project ownership confirmation code and paste it into your website’s section. This ensures that you're the legitimate owner of the site. We’ve shared more details about website ownership confirmation on our website.
- Click on Save project > Submit for review. We’ll check it within 1 working day. Once it's confirmed, you're all set to start accepting payments!
Step 4: Try it out on the Paysera Checkout demo
You’re almost done!
Before we wrap things up, we suggest giving the Paysera Checkout demo a try. It's a great way to get a feel for it and see what your clients will experience and see the process from their perspective.
For more technical details on integrating Paysera into your e-shop, check out our developer page.
Step 5: Complete the integration
Ready for the last steps?
To complete the integration, you’ll need your project ID and password – both are necessary to integrate Paysera into your website.
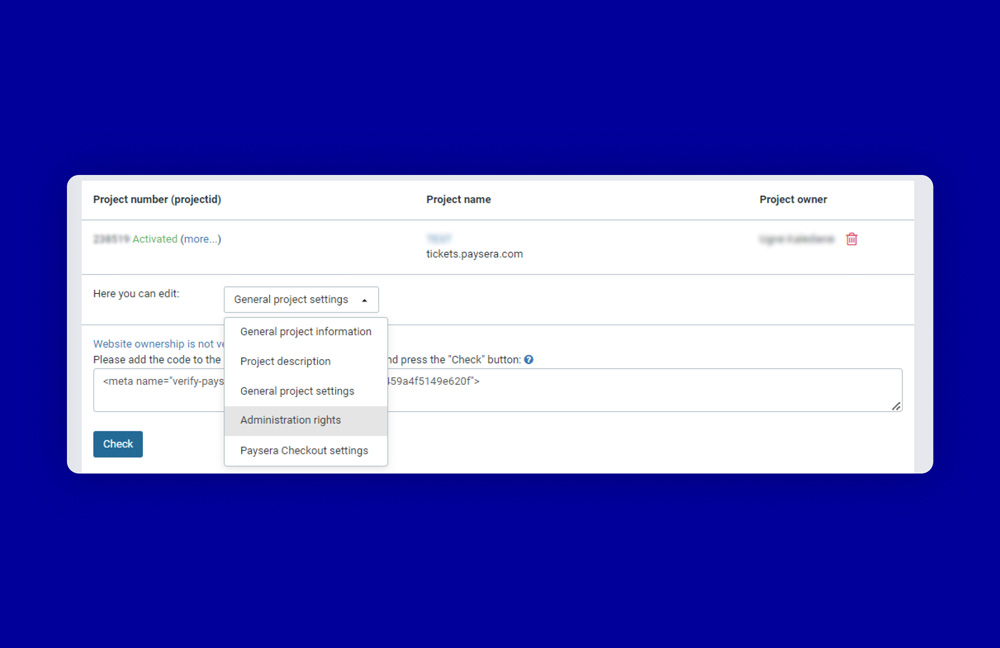
The project ID is visible in your project list and the password can be found by clicking on Project settings > select General project settings.
While you're in the General project settings, take a moment to review some key details. You can select the account you want your e-shop’s payments to go to and whether you'd like to handle money in different currencies. Don't forget to leave your email address so we can help you stay informed about any updates.
Also, think about adding the Paysera trust badge or a donations button to your website for added convenience. Once you're satisfied with everything, press Save.
Want to share rights with another Paysera user?
If you want to grant rights to another Paysera user to manage or view the project, click on Project settings > select Administration rights > enter the person’s details and review the rights.

Also, by going to Project settings and then to Payment checkout settings. Here, you can activate useful features like test payments, email notifications after successful payments, and select payment methods and countries that suit your business best.
Feel free to adapt it all to your needs!
What types of payments can be accepted through Paysera Checkout?
- Payment initiation service (PIS);
- Bank Link;
- Visa, Mastercard, Maestro credit, and debit cards;
- Individual orders;
- Cash;
- And other types of payments.
Can Paysera be integrated into an existing e-commerce platform or website?
Absolutely! Check the “If you are using another platform for your e-shop” part under “Step 2” in this blog post.
Things aren’t going in the way they should? We’re here for you!
Occasionally, we conduct routine maintenance to ensure the safety and quality of our services, which may temporarily impact operations, including payment gateway projects. Your first stop should be our status page, where we provide real-time updates on any technical or service-related issues./p>
If you can't find the solution there or if you're facing a unique challenge, our client support team is here to lend a hand. Feel free to reach out, and we'll do our utmost to assist you.
Enjoy all the payments heading your way!